How to create a new project
Created:
2015-05-05
Last updated: 2018-08-14
Last updated: 2018-08-14
Post view count: 2590
Sugester enables you to create, manage and track projects. At their core, projects are basically a collection of tasks; however, every project has some unique properties that make working on complicated tasks easier. To create a new project, go to Projects on the top menu pane and click +New project. You will see the following screen:
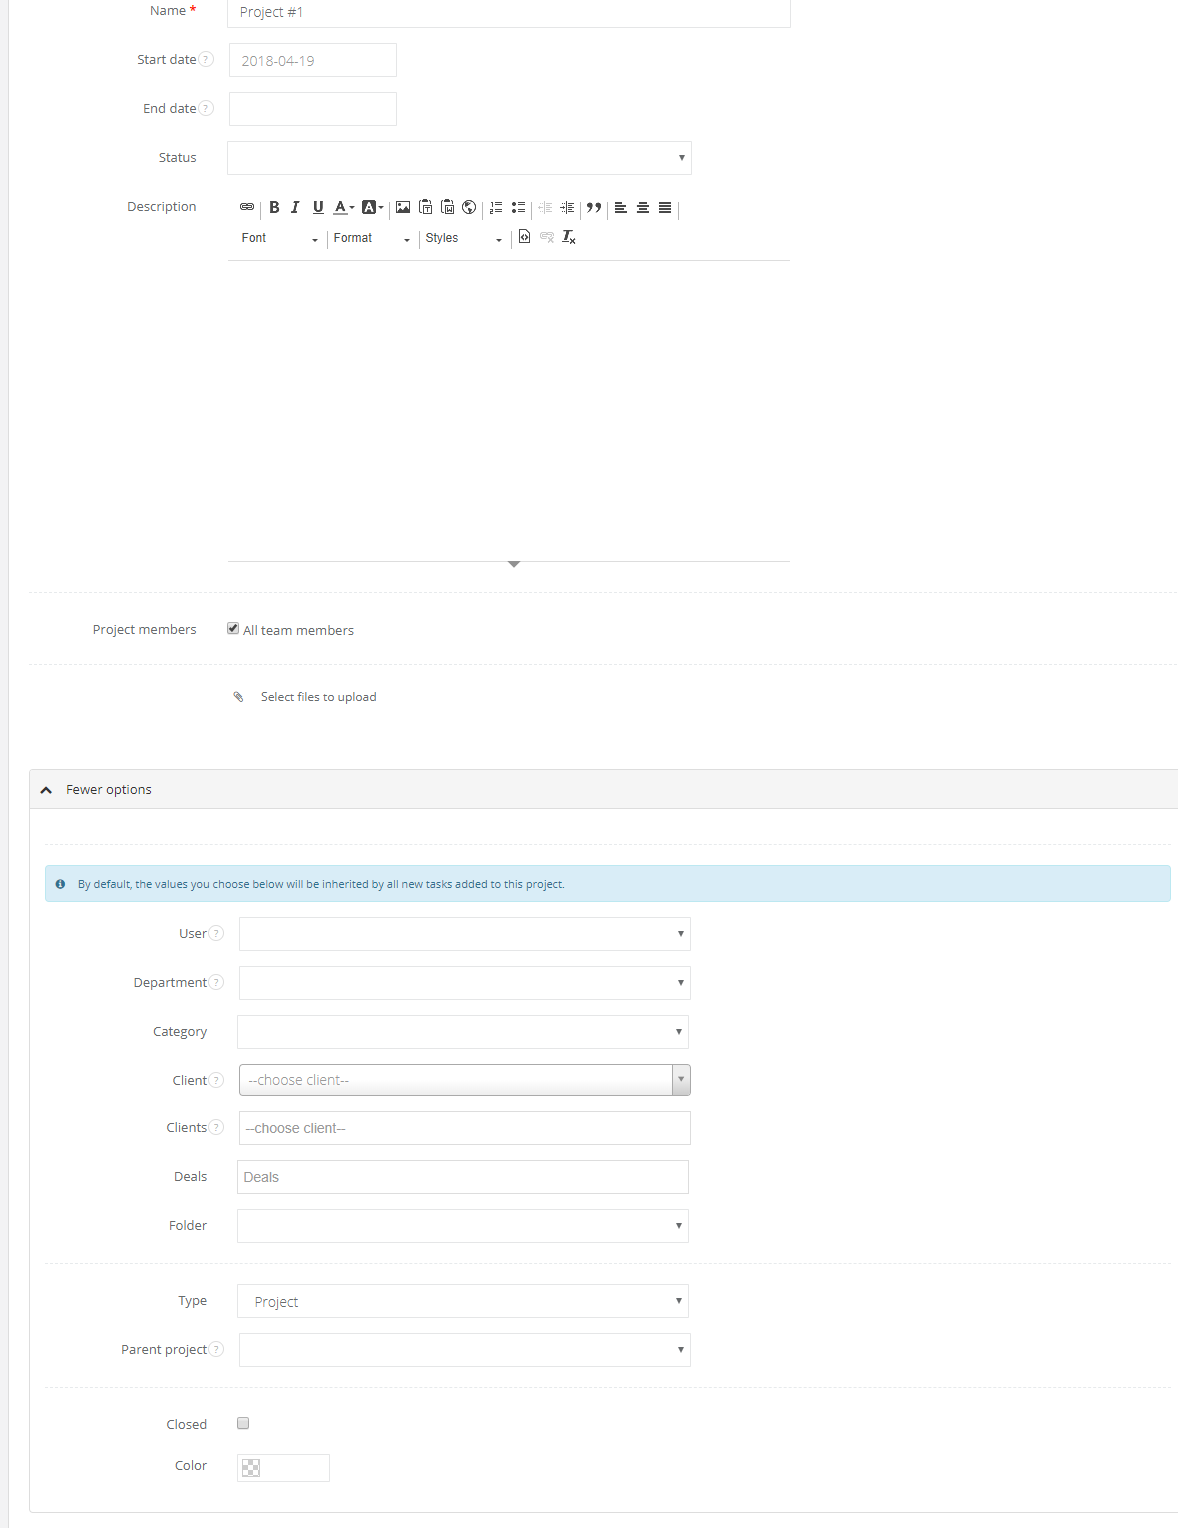
As you can see, there are multiple settings that you can adjust for your new project:
As you can see, there are multiple settings that you can adjust for your new project:
- Name;
- Start date;
- End date;
- Status;
- Description;
- Project members - the project can include all users on your account (default), or just a part of your team;
- Attachments.
- User - this person is the owner of the project; unless indicated otherwise, all new tasks within this project will be assigned to them;
- Department - the project will only be accessible by team members from the department you choose here;
- Category - choose if you want to assign category to the project and later you will be able to filter through projects in more detail;
- Client - if this project is being completed for a client, you can select them here; the project will appear on the client's client sheet; all new tasks within this project will be assigned to this client by default;
- Clients - for information purposes only; you can input multiple client names here, but this project will not appear on their clients sheets;
- Deals - if this project is being completed for a deal; the project will appear on the deal's deal sheet; all new tasks within this project will be assigned to this deal by default;
- Folder - choose if you want the tasks and emails within this project to be displayed as a separate folder in your inbox view;
- Type - choose the type of the project;
- Parent project - if you are working on a very complicated project, you can divide it into sub-projects; select the parent project here if this is a sub-project;
- Closed - check this box if this project is done;
- Color - to add color which will be displayed in the projects list next to the particular project.
Back
Add Comment