Introduction
Sugester allows you to create and send email marketing campaigns, segment their recipients and automatically reply with follow-up emails to recipients who click a link within your message. This makes Sugester a great tool for those who want to quickly build and send out an email marketing campaign.
Before you can send your first campaign, you have to make sure that you have the email marketing module enabled. To do so, go to Settings in the top right-hand corner, click on More and scroll down. You will see this icon:
![]()
Click it to enable the email marketing module. After you've done so, a new option will appear on the top menu pane named Email campaigns. Click it to start building your first email campaign.
There are three kinds of campaigns that you can create (and combine) in Sugester:
- Basic campaign - simply send out emails to a list of recipients,
- Campaign with autoreply - send out an email with an embedded link; recipients who click it will receive a second follow-up message,
- Tag recipients - send out an email with an embedded link; recipients who click it will be tagged, which allows for easy segmentation of your address list.
Creating a mailing list
Before you send your first campaign, you have to create a Mailing list. This can be done either by tagging clients in the CRM module, pasting a list of email addresses into Sugester, or importing an XLS/CSV file into Sugester and applying a tag to the newly imported entries.
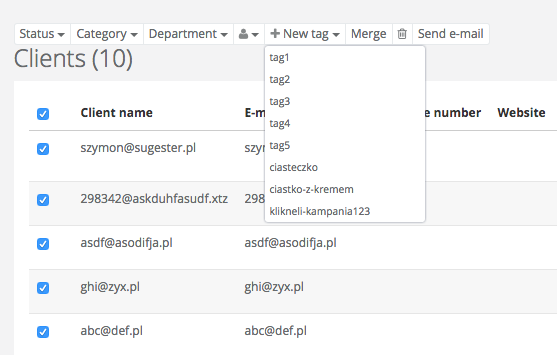
To create a mailing list by tagging clients, go to Clients on the top menu pane. Select the clients that you want to tag and click on + New tag from the options menu on the top. You will see the list of tags available on your account. You can create new tags by going to Settings > Email settings > Tags / mailing lists.
To paste a list of email addresses into Sugester, go to Settings > Email settings > Tags / mailing lists and click the + New button. You will be prompted to enter a name for your mailing list and populate it with addresses. Please note: addresses have to be separated by commas or new lines.

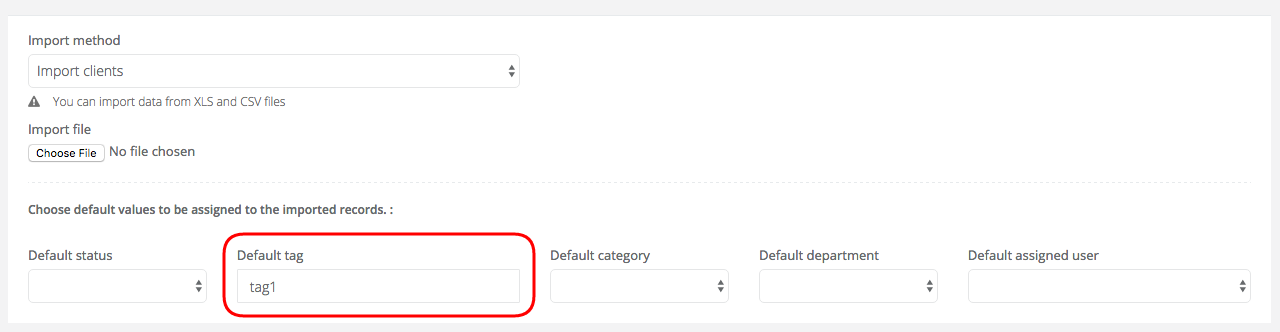
To import a mailing list from an XLS/CSV file go to Settings > Import/Export and follow the steps from this article. Make sure that you apply a tag to all your newly imported entries.
Creating a basic email campaign
Sending a basic email campaign from Sugester is very simple. After you've created a mailing list, go to Email campaigns on the top menu pane and click on Send campaign.

You will see a familiar screen prompting you to select a Sender (the address from which your campaign will be sent), Recipients (you can choose a mailing list that you created ealier or manually enter recipients), Title (the sujbect of your email) and Email content.

After you're satisfied with your copy and have made sure that all the other fields are filled out correctly, simply click Send. That's it - your campaign is now on the way to its recipients!
Creating an autoreply email campaign
Sugester allows you to create two-step email campaigns. This means that after you've sent out your inital email, users will receive a second, follow-up message if they've clicked a link embedded in the first email.
To create an autoreply email campaign, go to Email campaigns on the top menu pane and click on New autoreply.

You will see the following form:
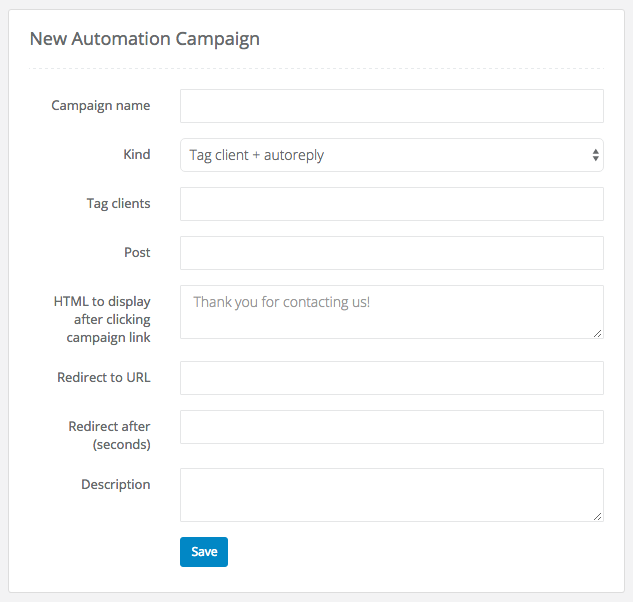
The form can be populated with the following content:
- Campaign name - an informative name for your new email campaign;
- Kind - you can choose from three kinds of campaigns: mass mailing (one-step campaign), tag client (tag clients who click an embedded link) and tag client + autoreply (two-step campaign);
- Tag clients - enter the tag which you want to apply to the recipients who click your link, for example 'clients-who-clicked-link';
- Post - paste a link to the email message to be sent as the second step in your email campaign;
- HTML to display after clicking campaign link - HTML markup entered into this field will be rendered and displayed to the recipients who click your link;
- Redirect to URL - clients who click your link will be redirected to this URL after X seconds;
- Redirect after (seconds) - enter the number of seconds after which your campaign recipients will be redirected to the URL from the previous field;
- Description - a description of your email campaign.
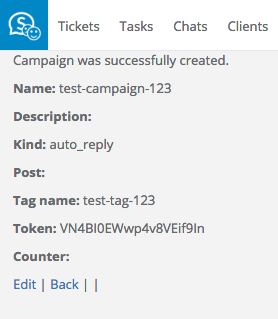
After you've clicked 'Save', you will see the following confirmation screen:

If everything is in order, click Back. You will see a list of all your existing email campaigns:

Click the Test button on the right-hand side of your new campaign with the right mouse button and select Copy link address from the drop-down menu. Save the link in a text file or other convenient format - you will need it to create your email message.
Now that you have successfully created an autoreply link, you can create a new campaign by following the steps from the previous section ('Creating a basic email campaign'). Remember to include the link in your email copy - ony the recipients who click it will receive your autoreply.
Create an auto-tagging email campaign
Another kind of email campaign available in Sugester is the Auto-tagging campaign. This means that clients in your database will receive an email with an embedded link and will be automatically tagged after they've clicked it. This is a great feature for recipient segmentation, since auto-tagging lets you know which recipients are the most interested in your mailing campaign.
To create an auto-tagging email campaign, go to Email campaigns on the top menu pane and click on Tag recipients.

You will see the following form:

After you've filled out the form, you can click Save. Please note that the Campaign name and Tag clients fields are mandatory.
After you've clicked 'Save', you will see the following confirmation screen:
If everything is in order, click Back. You will see a list of all your existing email campaigns:
Click the Test button on the right-hand side of your new campaign with the right mouse button and select Copy link address from the drop-down menu. Save the link in a text file or other convenient format - you will need it to create your email message.
Now that you have successfully created an autoreply link, you can create a new campaign by following the steps from the section 'Creating a basic email campaign'. Remember to include the link in your email copy - ony the recipients who click it will be tagged.