You will see a pop up window with all necessary fields.
Learn more about:
- deleting custom fields
- adding custom fields
- changing the order of the field
- changing the name of the field
How to delete a field
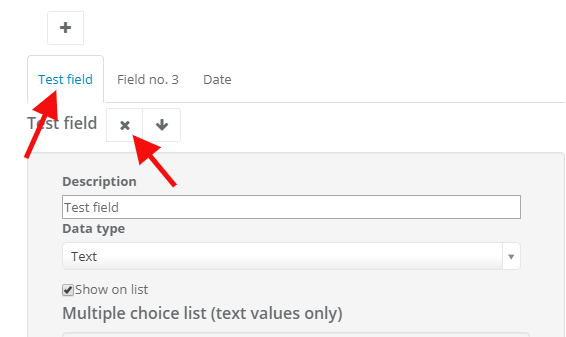
To delete a custom field1. Click on the field you'd like to delete. The field's name will be highlighted in a blue colour
2. Click on X. The field will be deleted.
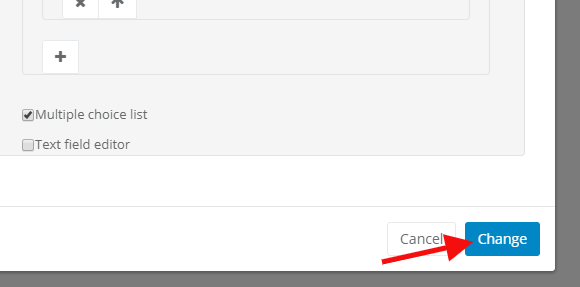
3. Click on Change
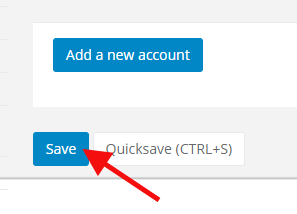
4. Click on Save on the bottom of the page:
NOTE! If you delete a custom field, all data from this field will be deleted in each client's profile in the CRM
Remember, if you delete a custom field, you cannot make other changes on other fields at the same time. Deleting a field must be a separate activity, ended with clicking on Change and Save. Only after doing that you can get back to the editor and make other changes, such as editing or changing the order.
Deleting a custom field cannot be done with any other activity. Otherwise you're risking changes in existing custom fields.
Adding a custom field
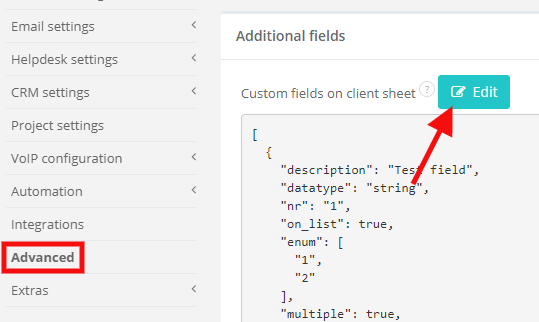
To add a custom field you can use some pointers from the article Custom fields in CRM module. However, if you need to change many things at once, try the way described below:1. Select Settings > Account settings > Advanced > Additional fields > Custom fields on client sheet > Edit
2. Click on the + icon to add a new field
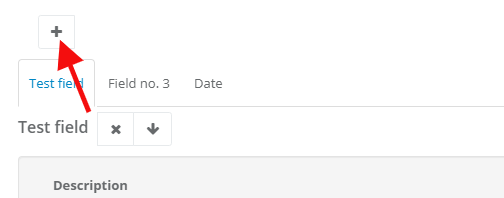
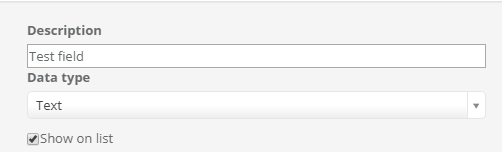
3. The new field will appear at the end of your list. In the description field write down its name:
4. Click on Change
5. Click on Save at the bottom of the website
Changing the order of fields
If you want to change the order of fields, you can use up/down arrows1. By clicking on the 'up' arrow you will move the field to the top of the list. With the 'down' arrow the field will be moved to the end of the list.

2. After moving everything you wanted, click on Change.
3. Click on Save at the bottom of the website
While you're changing the order of fields you can also edit order of other fields in one session (without clicking Change > Save all the time)
Changing the name of the field
To change the field's name:1. Click on the field you'd like to change. Field's name will be highlighted in a blue colour
2. In the Description field write down the new name
3. Click on Change
4. Click on Save
While changing the name you can make changes in the order at the same time. At once you can add a new field, move it however you want and then change its name. After clicking on Change and Save all data will be saved and won't affect other fields.