Tasks' templates (defined tasks' content)
Created:
2019-02-13
Last updated: 2019-02-13
Last updated: 2019-02-13
Post view count: 2227
If you create a lot of repeatable tasks, often with the same content, you don't have to waste your time for doing that anymore. You can just use tasks' templates in Sugester.
In a template you can input the title, content, add a comment, a picture or a screenshot. Such template you can use whilst creating tasks for your coworkers, departments or a whole company.

Next click on New template +

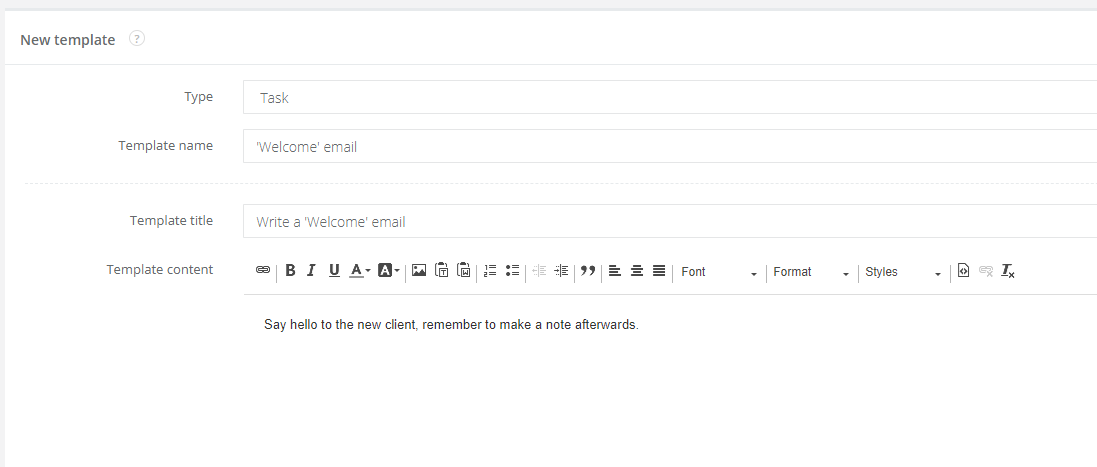
You will be transfered to the new template window. It's almost the same window you have displayed while creating an email template, but in the Type field Task kind will be automatically selected.
Here you can choose template's name, title and content. While filling the content, you can use the editor to make task's content clearer. You can also add a comment, screenshot or a picture.

You can also select users with privilege to use the template. After filling all the fields select Save.
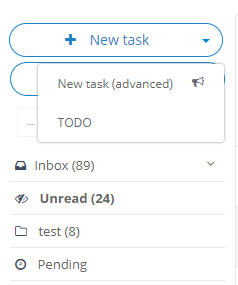
Done! From now on, to use a template, go to your Inbox and create a task by unfolding an arrow on the +New task button, and select New task (advanced):

You will be transfered to the new task window. In the top right corner you can select a task template. In here only tasks' templates will be displayed.
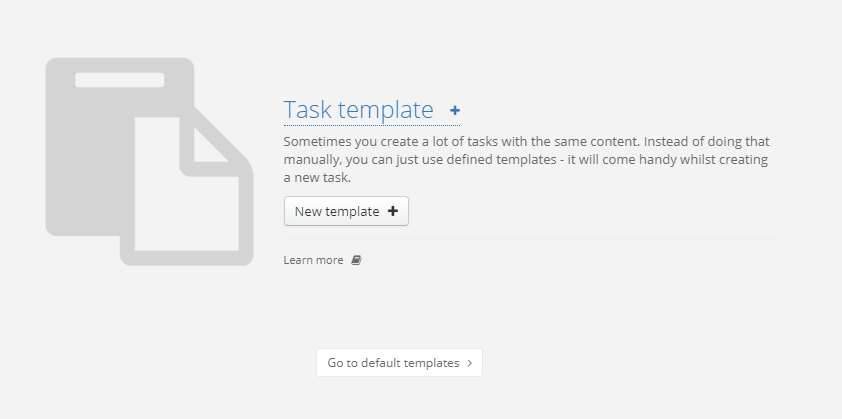
If you've created few tasks' templates you can easily look them up on the list. Just select Settings > Helpdesk settings and click on Tasks templates. From here you can add a new template by clicking on the blue button +New template or go to email templates by changing the template's kind:

In a template you can input the title, content, add a comment, a picture or a screenshot. Such template you can use whilst creating tasks for your coworkers, departments or a whole company.
Adding a template
A task template can be created by the administrator or account's owner. To do so, go to Settings > Helpdesk Settings and select Tasks templates:
Next click on New template +

You will be transfered to the new template window. It's almost the same window you have displayed while creating an email template, but in the Type field Task kind will be automatically selected.
Here you can choose template's name, title and content. While filling the content, you can use the editor to make task's content clearer. You can also add a comment, screenshot or a picture.

You can also select users with privilege to use the template. After filling all the fields select Save.
Done! From now on, to use a template, go to your Inbox and create a task by unfolding an arrow on the +New task button, and select New task (advanced):

You will be transfered to the new task window. In the top right corner you can select a task template. In here only tasks' templates will be displayed.
Note! If you want to create a task with a template, you can only do it by clicking +New task from the Inbox (described above). You cannot create a task with a template by task's pop-up window.
Tasks' templates list
If you've created few tasks' templates you can easily look them up on the list. Just select Settings > Helpdesk settings and click on Tasks templates. From here you can add a new template by clicking on the blue button +New template or go to email templates by changing the template's kind:
Back


Add Comment